Meatless Monday or Everything But The Kitchen Sink Salad

Recipe of the Month: Meatless Monday or Everything But The Kitchen Sink Salad

Recipe of the MonthINGREDIENTS

Salad

  • 4 cups cabbage (green and red)
  • 5 kale leaves cut into ribbons
  • 5 thin slices red onion (rings separated or chopped)
  • 2 cups broccoli florets
  • 8 thin cucumber slices
  • 2 organic carrots sliced
  • 3 organic radishes sliced
  • 1 cup red organic (or any color) pepper chopped
  • 2 cups cauliflower florets
  • ½ cup cilantro chopped

Sauce: (adapted from Maximized Living)

  • ½ cup organic peanut butter (can use almond or cashew)
  • ¼ cup tahini
  • ¼ cup coconut aminos
  • 1 Tablespoons coconut milk (or cream)
  • 1 clove garlic minced
  • 1 Teaspoon ginger root grated
  • ½ teaspoon curry powder
  • Dash red pepper flakes

PREPARATION INSTRUCTIONS

  • Put all veggies into a big bowl
  • Mix all sauce ingredients until smooth
  • Pour sauce over veggies and toss well

NOTES

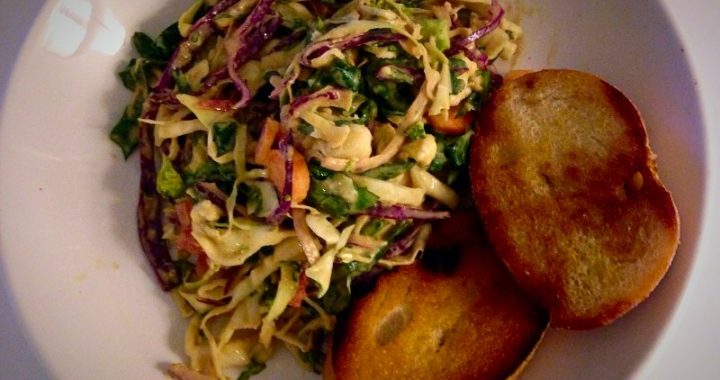
The ingredients change each time I make this salad. Basically, it is whatever I have in the fridge.  It is a great way to use up left over veggies. Sometimes I use zucchini or green beans, tomatoes, spinach, lettuce, mushrooms. It really depends on what I have around.  You can also substitute almond butter for the peanut butter. I just happen to like a peanut sauce on a salad.  Garlic bread is a great complement but, if you aren’t doing the bread thing, it really isn’t necessary. The salad is filling and satisfying and is even better the next day. If you don’t want leftovers cut back on the amounts. This is one dish where you can add or leave out anything and it will still be good. It really is up to you and your taste buds. An added benefit – you are eating raw foods which are great for your health. I try to have this once a week.

The Not So Traditional Fruit Cake

Recipe for Month: The Not So Traditional Fruit Cake

Recipe of the MonthINGREDIENTS

  • 1/2 cup dried apricots, chopped
  • 1/2 cup dried cherries (got these from whole foods – amazing)
  • 1/2 cup dried cranberries
  • 1/2 cup golden raisins
  • 1 vanilla bean split lengthwise, seeds scraped and reserved
  • 1 organic orange zested
  • 1 cup bourbon
  • 1/2 pistachios, finely chopped
  • 1/2 sliced almonds
  • 1/2 cup pecans, finely chopped
  • 1/2 cup walnuts, finely chopped
  • 3/4 cup unsalted butter, softened
  • 1 cup firmly packed dark brown sugar
  • 2 large eggs
  • 1 teaspoon vanilla bean paste
  • 1 1/2 cups all-purpose flour (I use einkorn flour made from ancient grain wheat)
  • 1 teaspoon baking powder
  • 1 teaspoon kosher salt
  • 1 teaspoon ground cinnamon
  • 1 teaspoon ground ginger

PREPARATION INSTRUCTIONS

  • In a heatproof bowl, combine apricots, cherries, cranberries, raisins, vanilla bean and reserved seed, and orange zest.
  • In a small saucepan, heat the bourbon over medium heat – do not boil. Pour hot bourbon over dried fruit. cover and let stand for 1 hour.
  • Preheat oven to 350 degrees. Line a 9×5 loaf pan with parchment paper and then grease and flour it. (I know this seems like over-kill, but trust me, you’ll be glad you followed this step).
  • Drain fruit, reserving bourbon.
  • Remove and discard bean.
  • In a large bowl, toss fruit with all the nuts.
  • Beat the butter and brown sugar until fluffy – about 3-4 minutes.
  • Add eggs, one at a time, beating well after each addition.
  • Beat in vanilla bean paste.
  • Whisk together, flour, baking powder, salt, cinnamon, and ginger.
  • Gradually add flour mixture to butter mixture, beating til jut combined.
  • Add fruit/nut mixture, beating until just combined – batter will be thick!
  • Spoon batter into prepared pan, smoothing top with a spatula.
  • Bake until a wooden pick inserted in the center comes out clean. – 1 1/2 – 2 hours.
  • Cover with foil after 30 minutes of baking to prevent excess browning.
  • When done baking, pour reserved bourbon over hot loaf and let cool completely in the pan.
  • Wrap tightly in plastic. can be stored at room temperature for 2 weeks.

NOTES

This recipe was adapted from Bake from Scratch. I left out the turbinado sugar topping from this recipe because I didn’t think it added anything to the final product and was just excess sugar.

I made a second cake leaving out the raisins (my daughter hates raisins). and adding more cherries. I also substituted organic maple syrup for the brown sugar (equal amounts). And I used Rum instead of bourbon.

Next time – and there will be a next time – I will use bourbon. The rum was ok, just not as flavorful. I will also use chopped dates in place of the raisins. And because I love nuts I will probably up those to 3/4 cup each. I will use maple syrup in place of the brown sugar.

Everyone loved both cakes – even my daughter. If you’ve never liked fruit cake because of all the candied fruit, I suggest you try this. It is amazing. I was hoping to have some left for Christmas, but looks like I’ll be baking another!

Persimmon Bread Recipe

Recipe of the Month: Persimmon Bread Recipe

Recipe of the MonthINGREDIENTS

  • 1 ¾ cup flour
  • ¾ teaspoon salt
  • 1 teaspoon baking soda
  • ½ teaspoon nutmeg
  • 1 ¼ cup sugar
  • ½ cup unsalted butter (melted and cooled to room temperature)
  • 4 large room temperature eggs beaten lightly
  • 1/3 cup Irish whiskey or cognac or good bourbon
  • 1 cup persimmon pure (from 4-5 squishy ripe persimmons)
  • 1 1/2 cup pecan pieces (toasted)
  • 1 cup medjool dates, pitted and chopped

PREPARATION INSTRUCTIONS

  • Preheat oven to 350
  • Prepare a loaf pan, (I spread coconut oil on bottom and sides and then dust with flour – you can use butter)
  • Core the persimmons, scoop out the insides and puree in the blender
  • Sift or mix first 5 ingredients in a large mixing bowl
  • Make a well in the center of the dry ingredients add butter, eggs, liquor, persimmon puree, dates, and nuts
  • Mix to combine and pour into prepared pan
  • Bake for 1 hour or until toothpick inserted in the center comes out clean
  • Let cool before turning out of pan and slicing the bread

NOTES

Wrap well to keep at room temperature (if it doesn’t disappear the first day!)

Adapted from James Beard recipe

End of the Summer Corn Chowder

Recipe of the Month: End of the Summer Corn Chowder

Recipe of the MonthINGREDIENTS

  • 4 ears organic, non GMO corn (remove husks and silk, cut kernels from cob)
  • 1 ½ T butter
  • 3 slices bacon cut into ½ inch pieces
  • ¾ c chopped yellow onion
  • 1/8 c flour
  • 1 clove garlic minced
  • 4 cups water (could use chicken stock if you prefer)
  • 3 medium sized organic Yukon gold potatoes peeled and cut into small cubes
  • 4 sprigs thyme (or ½ t dried thyme)
  • 1 bay leaf
  • Salt and Pepper to taste
  • ½ c half and half
  • ½ T honey
  • 2-3 T chopped fresh chives (or the green part of scallions)

PREPARATION INSTRUCTIONS

  • Melt butter in large pot (I used cast iron).
  • Add onion and bacon, cook stirring until onion has softened and is starting to brown
  • Add flour and garlic, whisk and cook for 1 ½ minutes
  • Slowly pour in water.
  • Bring mixture to a boil.
  • Add corn and potatoes
  • Add thyme and bay leaf, Salt and Pepper
  • Bring to light boil and then reduce to simmer – cooking until potatoes are tender.
  • Remove bay leaf and thyme sprigs.
  • Transfer 1 ¼ cups chowder to a blender and blend until smooth.
  • Stir this mixture back into the pot.
  • Stir in half and half and honey.
  • Sprinkle each serving with chives.

NOTES

Serve with a baguette and butter for a light dinner or great lunch!

If you like spicy add some red pepper flakes or chopped poblano peppers when simmering.

I didn’t have any Yukon potatoes so I used red organic. They just have to cook a little longer to get tender.

I used fresh bacon that I got at the farmers’ market, but I have also used pepper bacon in the past.

For a vegetarian version just leave the bacon out. I would definitely then add peppers to give some additional flavors. You could even use red and yellow peppers to add color as well as flavor. More garlic and onion is also an option.  Original recipe from Cooks Illustrated.

Recipe of the Month: Grilled Lime Cilantro Shrimp with Remoulade Sauce

Recipe of the MonthINGREDIENTS

Grilled Cilantro Lime Shrimp with Remoulade Sauce

  • 1 lb. shrimp (tails on)
  • ¼ cup Cilantro (stems and leaves chopped)
  • 4 cloves garlic minced
  • 2 Tablespoons lime juice
  • 1 Tablespoons olive oil
  • Salt and Pepper

Sauce

  • ¼ cup organic sour cream
  • ¼ cup organic mayo (I use avocado mayo or one without canola oil)
  • 2 cloves garlic minced
  • 1 teaspoon prepared horseradish
  • 1 teaspoon mustard (I use a course mustard)
  • 1 teaspoon Worcestershire sauce
  • 1 teaspoon juice from sweet pickles or pickle relish
  • 1 Tablespoon sundried tomatoes packed in oil – very finely minced
  • 1 Tablespoon paprika
  • 1 Tablespoon organic ketsup
  • ½ teaspoon Cajun spice

PREPARATION INSTRUCTIONS

  • Take the shells off the shrimp
  • Mix the other ingredients in a deep bowl
  • Put the shrimp in the olive oil mixture
  • Toss and put in the fridge to marinate for at least 1 hour
  • Next mix all the ingredients for the Sauce
  • Put in the fridge until ready to serve
  • Heat the grill
  • Put the shrimp in a grill pan or on skewers to cook
  • Toss or turn once or twice
  • When the shrimp turn pink, they are done (it doesn’t take long)
  • Spread a bun with the Remoulade sauce and top with the shrimp
  • You can add lettuce and onion if you desire.

NOTES

For a summertime meal add slaw and potato salad.

Or

Serve the shrimp as an appetizer with the Remoulade as a dipping sauce.

Fresh Taste of Summer

Recipe of the Month: Fresh Taste of Summer

Recipe of the MonthINGREDIENTS

  • 1 Tablespoon olive oil
  • 1 Tablespoon butter
  • 8 basil leaves chopped
  • 1 small yellow squash, sliced
  • 1 small zucchini, sliced
  • 3 small tomatoes cut into 6ths or small bite sized pieces
  • ½ onion sliced
  • Salt and Pepper to taste

PREPARATION INSTRUCTIONS

  • Melt the butter in a skillet on medium heat
  • Add olive oil
  • Add the onion slices and sauté till soft
  • Add the squash and zucchini, salt and pepper
  • Sauté until al dente
  • Add basil and tomatoes
  • Stir and sauté till tomatoes are warm
  • Serve and enjoy the fresh taste of summer!

NOTES

Great with Grilled Chicken!

Recipe of the Month: Summer Cucumbers

Recipe of the MonthINGREDIENTS

  • 2 medium sized cucumbers (I prefer pickling cucumbers) sliced
  • 1/3-1/2 feta cheese (with Mediterranean spices)
  • 1/2 cup radish sprouts
  • 1 Tablespoon olive oil
  • sea salt and cracked pepper

PREPARATION INSTRUCTIONS

  • Slice the cucumbers and arrange on a plate.
  • Sprinkle the cheese over the cucumbers.
  • Drizzle with the olive oil.
  • Top with the radish sprouts.
  • Add the salt and pepper.

NOTES

For some reason, my husband, who hates cucumbers really likes this recipe.

I’m guessing it’s all in the cucumber! Last year we grew pickling cucumbers and they were really sweet.

I found out later that cucumbers do best when growing next to sunflowers.

Quite by accident, the birds had dropped some sunflower seeds from the feeder and I let them grow and bloom! If you aren’t into growing cucumbers you can get pickling cucumbers at the farmers market. They are smaller, not as smooth as salad cucumbers, and a little lighter green. The merchant will be able to tell you whether or not they are pickling cucumbers.

The same recipe can be used to make cucumber appetizer bites. Slice the cucumber in half lengthwise. Scoop out the middle and chop. Mix this chopped cucumber with the cheese and the olive oil (to hold it together). Sprinkle with Salt and Pepper and mix it all together. Fill the center of the cucumber halves and slice into 1/2-inch pieces.

Grilled Summer Dinner

Recipe of the Month: Grilled Summer Dinner

Recipe of the MonthINGREDIENTS

  • 1 small yellow squash sliced
  • 1 small green squash sliced
  • 4 small potatoes par boiled and sliced
  • 1 small onion sliced
  • 1 cup cherry tomatoes sliced
  • 2 T. olive oil
  • Salt and Pepper to taste
  • 3 springs of rosemary
  • 6 small peppers tops off and seeds taken out
  • 1 container boursin cheese (your choice as to flavors)
  • Steak or meat of your choice

PREPARATION INSTRUCTIONS

  • This is one of the easiest summer time recipes ever! Put all veggies but peppers in a bowl and toss with the olive oil and S & P
  • Put in a grilling pan and add the sprigs of rosemary
  • Stuff the peppers with the cheese and put in a grilling pan or thread them through a skewer at hold upright.
  • Season your steak with a little salt and pepper and put everything on the grill.
  • Toss the veggies now and then. Cook your steak to desired temperature
  • Enjoy!

NOTES

The farmers’ markets are open and it just seems like it’s time to cook outside. I did not go into a lot of details with this recipe because it is fairly simple and because the ‘doneness’ of the steak (or fish if you prefer) is a personal preference.

I personally like a little char on my veggies. If you prefer yours to be cooked but not charred then move them aside or take them off the flame sooner.

Recipe of the Month: Preserved Moroccan Lemons

Recipe of the MonthINGREDIENTS

  • 1-quart jar with a lid
  • 2 lbs. ORGANIC lemons (Meyer lemons are best – but regular lemons work also) (you will be eating the rinds)
  • ¼ – ½ cup unrefined sea salt or kosher salt

PREPARATION INSTRUCTIONS

  • Wash the lemons (yes, they are organic, but have been touched by many people).
  • Trim off the ends (don’t cut into the flesh).
  • Slice the lemons as if to quarter them, but DON’T cut all the way through. If you have large lemons you can cut them into 6 segments (star shaped). You just want them to open up- keep the base intact.
  • Put 1 Tablespoon of salt in the bottom of the jar.
  • Put 1 Tablespoon of salt in the center of the lemon, turn it, skin side up, into the bottom of the jar and tamp with a wooden spoon or the flat end of a large wooden knife to soften the lemon and release some of the juice.
  • Top that lemon with another tablespoon of salt and continue with the rest of the lemons (doing the exact same thing you did in the step above) until the jar is tightly packed and almost full.
  • Place one last tablespoon of salt on top of all the lemons.
  • At this point, you might need to juice a couple lemons. The brine should completely cover the lemons.If the brine doesn’t cover them they will develop mold. You can always discard that moldy lemon, but it is much easier to just make sure they are always covered with liquid.
  • Cover with the lid and let ferment for 4-6 weeks in a cool, dark place.
  • Gently shake the jar each day for the first week. When the lemons are ready to use they will look more translucent than when you started and the rinds will be very soft.
  • Technically you can keep them for a year – I like to put them in the fridge once I open the jar and start using them.
  • When you want to use a preserved lemon, rinse off the salt and pull off the pulp. Slice or mince the lemon peel. Yes, you are using the peel. I have known people to use the entire thing (after rinsing off the salt) for a more intense lemon flavor.

NOTES

Even though this is one of my very favorite seasonings to add to all sorts of recipes and I use it almost every day, I haven’ t mentioned it before because I hadn’t given you the directions to make your own preserved lemons.

It is a fantastic way to add interest and flavor to a multitude of dishes. (fish, potatoes, chicken, pasta, vegetables, desserts, etc.).

The options are limitless. Be creative!

Recipe of the Month: Avocado Egg Breakfast (for 2)

Recipe of the MonthINGREDIENTS

  • 1 avocado halved, seed discarded
  • 2 large eggs
  • 2 green onions sliced (including green part)
  • Salt and Pepper to taste
  • ½ cup of blackberries or fruit of your choice (1/4 cup for each person)
  • Toast (if desired)

PREPARATION INSTRUCTIONS

  • Heat oven to 350.
  • Flatten the bottom of the Avocado so it will rest on the baking dish or cookie sheet.
  • Set each half in a baking dish or on a cookie sheet.
  • Crack an egg and drop into the cavity formed by the seed (if your egg is large you may have to scoop out a little of the avocado.
  • You can eat it later, butter your toast with it, or put it into a small baking dish along with any extra egg.
  • Top it all with salt and pepper and the green onions.
  • Bake it in the oven until your egg reaches the doneness you prefer. If you like a hard yolk it will take a little longer. Just keep an eye on it.
  • Serve with toast and fruit.

NOTES

I have seen pictures of this breakfast for a long time and just wasn’t quite sure I wanted to try it.

I am so glad I did. It was amazing. My husband was a little skeptical when it started out, but ended up raving about it.

If you like things spicy you can always add a little sriracha hot sauce when serving. Actually, the condiments you want to add are totally up to you. Pretty much anything goes.

I had really large eggs so I put the extra egg white and avocado into a small ramekin and baked it at the same time.